This blog post was retracted by its creator. We apologize for the inconvenience.
|
This blog post has been retracted by its creator. We apologize for the inconvenience.
I recently came across "Camera Depth" under render passes in Maya. I was thinking to myself, "why would anyone need to render camera depth as a separate pass? Even if you want to create depth of field, it can be done using Maya cameras, as I've previously tested. [CLICK HERE for my Depth of Field test video]. IN A PRACTICAL SITUATION, is there really any significant difference between generating depth of field using Maya and in any other compositing software? So I started running tests. I created a scene in maya with primitives, but applied a number of different shaders, set up imaged based lighting, applied exposure correction lens shader to my renderCam and rendered using mental ray. This is what I got: 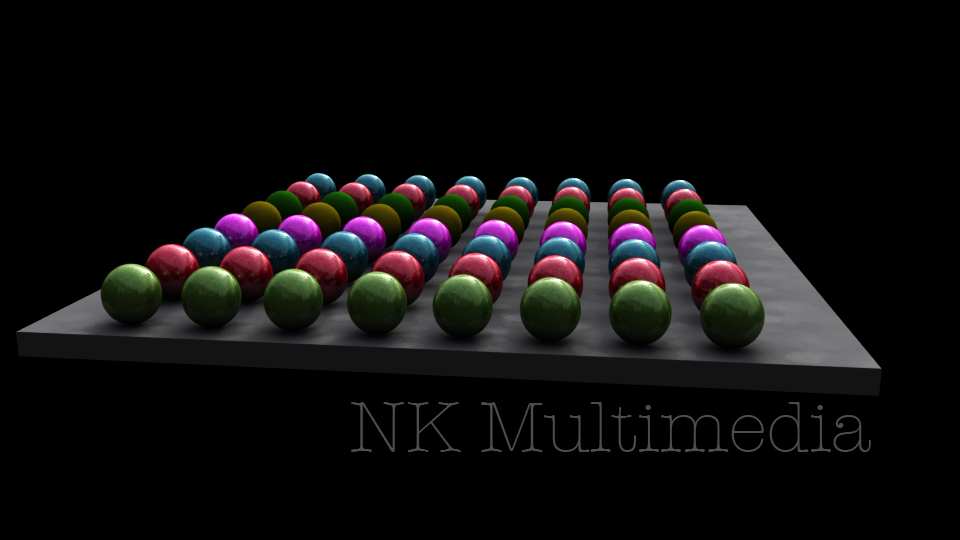
RGBA Render
NOTE: I purposely disabled primary visibility on the HDR image. I only wanted to use it for lighting, not for display in my final render. I proceeded to render a Camer Depth pass: 
Camera Depth Render Pass
Before moving on to compositing, I wanted to create the depth of field video in Maya. So I enabled the Depth of Field option in my renderCam, and made a test render to know my starting point. After 2 and a half long minutes, I ended up with this: 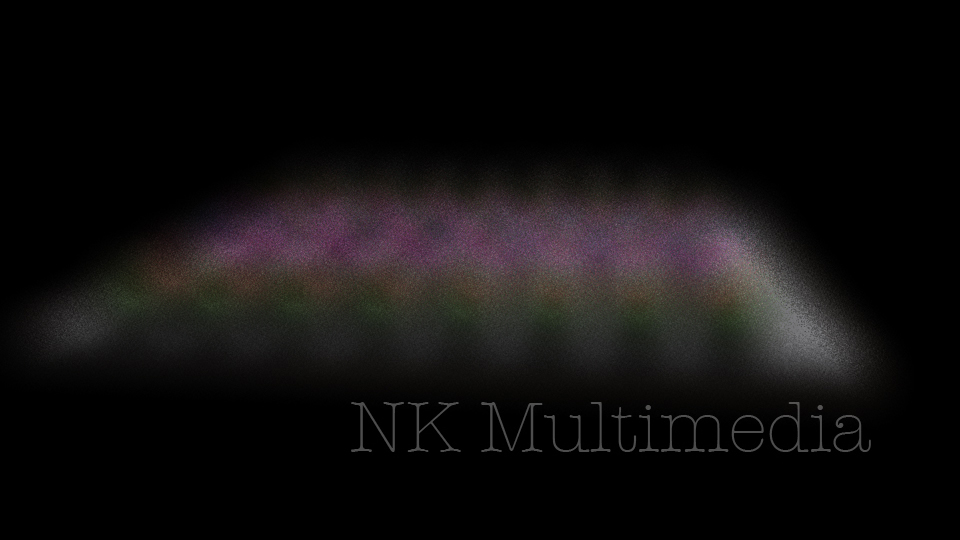
Depth of Field enabled in Maya's camera
OKAY!! So that's why they have a camera depth pass! Though it's possible to create DOF in maya, it'll take excruciatingly long to animate, and even longer to fine tune! So I moved on to open up my first 2 images in an After Effects comp, added Camera Lens Blur to my 1st image, setting the Camera Depth Map image as the gradient layer. After a few minutes of work, I was able to create this: From now on, I'll be adding an extra pass to my render queue!
I just posted my new song "Medieval Melody" and wanted to blog about it, because this song is rather special to me, mainly for 3 reasons:
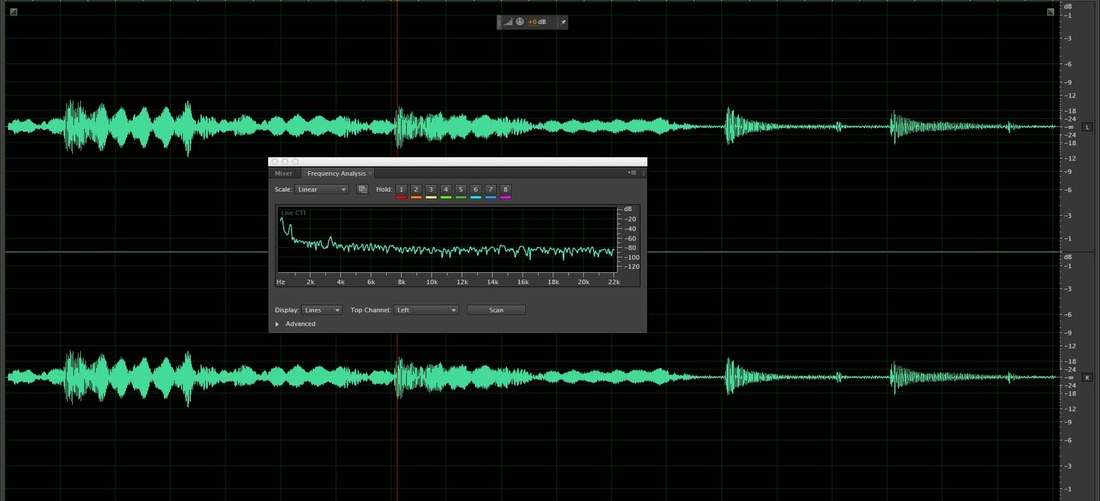
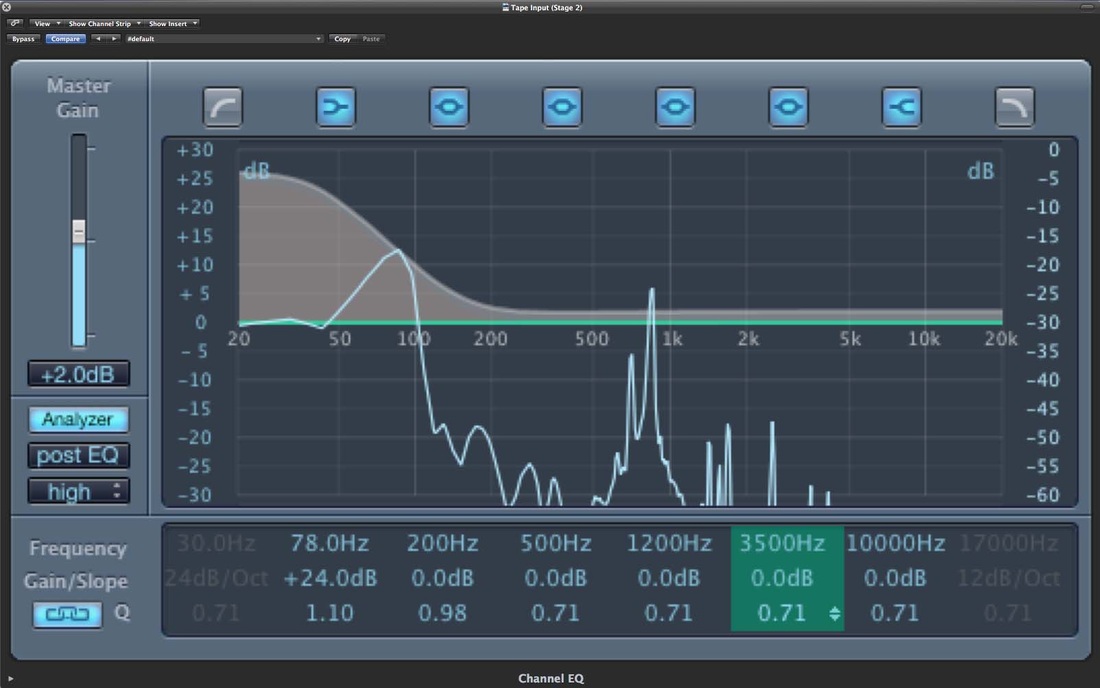
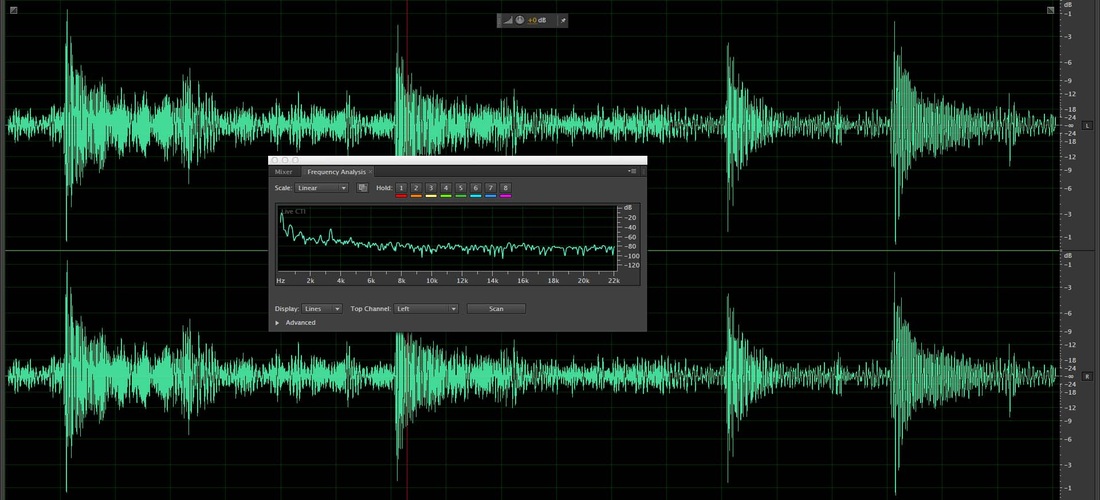
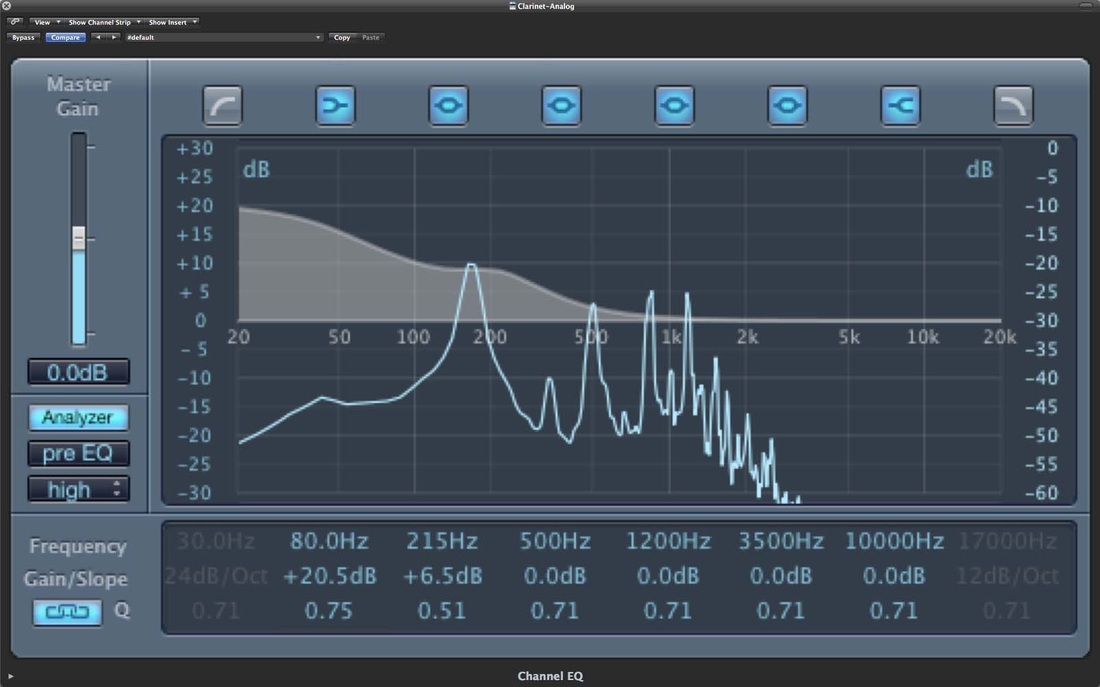
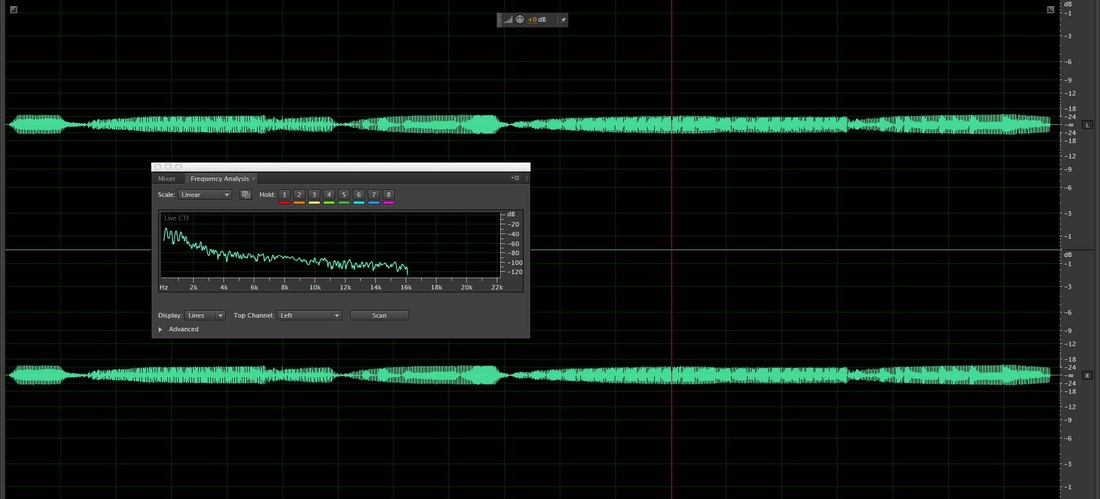
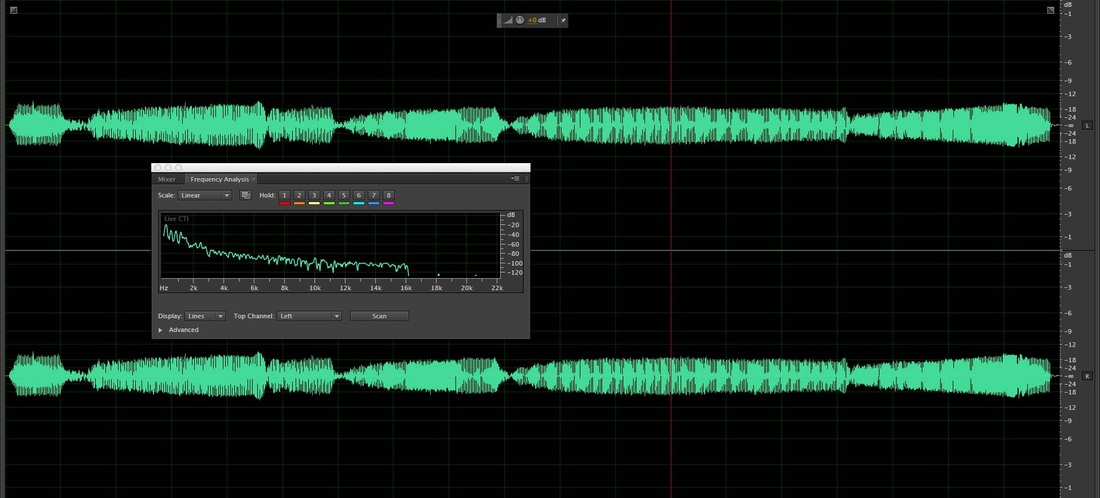
That is what I'm about to discuss in this blog-how I engineered the effect I wanted for the song. The Process of Sound Engineering On the same day the initial tune of the song sparked, I was listening to some songs on shuffle, when Moonlight Sonata came on, and I was mesmerized by not the song itself, but of the recording quality. It was a very old recording, accompanied by a prominent hiss, and all the other traits of such recordings. That's when I got the idea to start off the song with this kind of "low quality, old recording" effect, and eventually, have it transition to modern, digital quality. So, how did I accomplish it? I HAD TO TURN THIS: INTO THIS: Stage 1 - Basic Analog Effect I decided to do the obvious thing, and record the file onto an actual tape. Although, to reduce the quality, I tried feeding my tape deck wrong parameters. The first thing I did was turn of Dolby Noise Reduction. Next, I noticed I was using a Type I tape, so I set the deck to Type IV. I don't know what that does, but it certainly doesn't match, so it cant' produce optimum quality, right? Then, I decided to lower the volume on my laptop when recording, and set the record level on my tape deck to 10 (max). To my knowledge, this "record level" is nothing but a pre-amp built into the deck. Being an analog preamp it certainly can't produce as good a sound as a digital one. It's fine when used in the mid-range, around 4-6, but setting a preamp to max would push even a digital amp to loss of quality. Anyways, I lowered the output volume on my laptop so low, that even with the Record Level set to 10, the volume meters on the tape deck did not show any deflection. This way, I would have to increase the volume during playback, which would result in a more prominent tape hiss. INPUT: OUTPUT: Stage 2 - Repetition As you can see (or hear), the volume is low...really low! So what next? Amp it back up of course! Although, if I just used my DAW for that, I'll only be increasing the volume. Instead, if I use my tape deck, I'll be amplifying not only the volume, but also the analog characteristics of the sound! So that's exactly what I did! I left my tape deck's Record Level at 10, but increased the output volume on my laptop. I was keeping an eye on the volume level shown by my deck, making sure I wouldn't over amp it. Note: While recording the 2nd output track from my tape deck, I set the input channel to mono (instead of the default stereo). That's something I forgot to do with the 1st stage recording. INPUT: OUTPUT: Stage 3 - Channel EQ I really liked what I was hearing, but I felt that the bass wasn't as loud as I wanted it to be. So I created a channel equalizer to amplify the bass. This turned out to amplify the tape hiss as well. That's fine by me! Haha.
INPUT: OUTPUT: Stage 4 - Tape Delay Okay, so now, the bass is fine, plus I've got a nice hiss, and overall, it's really good! Sounds like it really was recorded a long time ago. But now, I feel like that's not enough. I don't just want the recording to be old, I want the tape to be old as well. That is, I want it to sound like the physical cassette is in a state of degradation. So how do I approach this requirement? I don't think there's anything more that I can get from repeatedly recording on tapes. So I've got to approach this digitally. I took a look through the available plugins and found a "Tape Delay", only, I don't want a delay. I need it to play along with my digital arrangement. So first thing I do is set the delay to 0, and start playing around with the other properties. The results were astounding! INPUT OUTPUT: Stage 5 - Layering Tape Hiss Sounds about done right? Well....I don't know....It still feels a little...empty......Why not layer it with some extra tape hiss? So I downloaded a track of plain tape hiss, lower the volume and layer it in. INPUT: OUTPUT: Stage 6 - Finishing Touches That's it! That's the sound I need!! This process worked for the most part, but for the phrase in the middle (where the song transforms from digital to analog again), I wanted only the recorder and clarinet to be analog, while the bass, cello and harp remained digital. So I had to rerecord those parts separately, repeating the process for each one. Unfortunately, the clarinet wasn't quite fluttering enough. I had to amplify the effect further for that track. I just played around with the tape delay settings and added another Channel Equalizer till I got what I wanted.
PHRASE IN DISCUSSION: INPUT (AFTER PASSING THROUGH TAPE STAGE 2): PROCESSING: OUTPUT: That's All Folks Yup, that's it! Now, I did add some extra reverb for most instruments, and went over the top with the final phrase of the song, but I didn't mention any of that in this blog. There's not really much work involved in all that. This took a couple of days to achieve, but I'm VERY proud of the output. It has been a pleasure working on this song. I really enjoyed the whole process. Final Output PLAYLIST OF TRACKS |
AuthorBSc Animation Student. Archives
December 2014
Categories |


 RSS Feed
